Introduction
This article is on my own note-taking method, which I gradually developed mainly in my 2 years in IB DP, by exploring and experimenting with a range of methods and borrowing from others. During that time, I refused to compromise on the shortcomings in my note-taking method as I continuously tried new methods to arrive at my current set of note-taking methods which satisfies me for now. Together with my current note-taking method, there’re some principles of note-taking–my ultimate goal of note-taking. My current method does not achieve my purpose perfectly, but based on these principles, I can always figure out a better way.
My note-taking method mainly works for the scenario in which I take notes as I listen in class and organize my notes quickly after each class. I used this methods for both the arts and the sciences, although it is not equally effective for all subjects. (See the section “Pros & Cons of My Current Method” in this article for more details.)
When preparing for exams, notes are not my main tool for revision, but rather a reference source to check for gaps when I encounter a key point I don’t know; they can also be quick reminders that refresh my memory. Personally, I didn’t prepare for many exams. For the IB DP Finals, my main tools for revision were the IB DP syllabi, past paper questions, and the textbooks that fit me the best (which I chose over two years of study), rather than my notes. I will mention that in future blog posts.
This article will cover.
- The note-taking methods I’ve tried, but didn’t work for me
- My current note-taking principles and method
- Pros and cons of my current method
I mainly want to use this article to clearly sort out my note-taking method, and also as a reference for myself when taking notes in the future. The added purpose of this article is to hopefully provide a reference for you by the way.
TL;DR is at the end of this post.
Abandoned Methods
Copying from Board or Slideshow
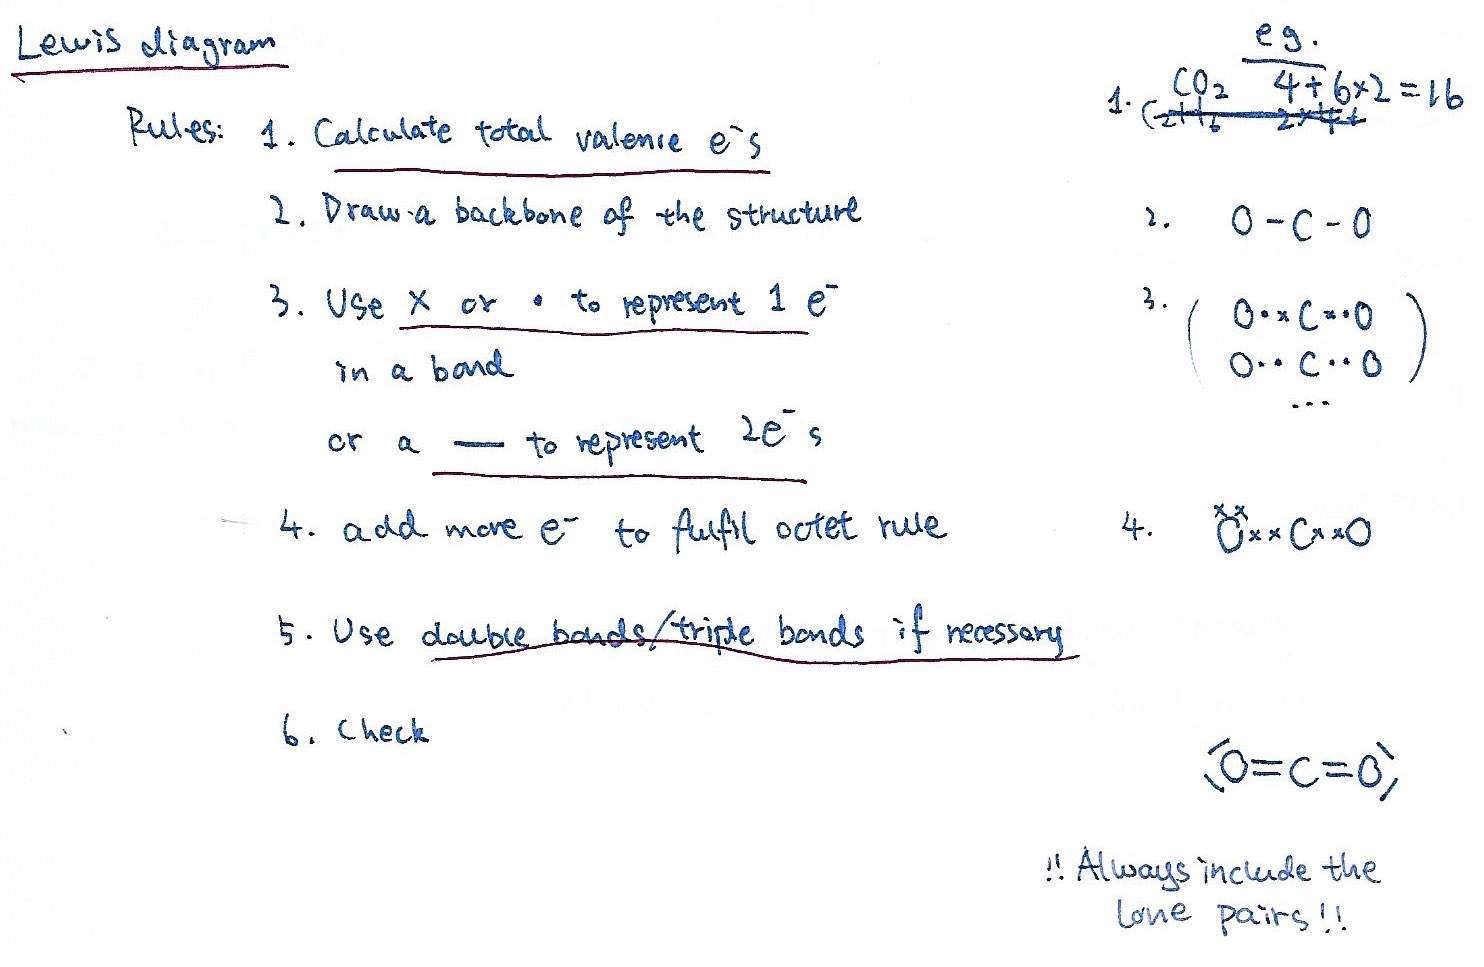
The chemistry notes that I copied directly from the board in class and annotated after class
This method involves manually copying what a teacher writes on the board or slideshow to my notebook during class, and then using colored pens, markers and things like that to annotate or add content after class.
Why I used it before: Some teachers would write on the board in the form of notes. For example, they would list out the key points—first, second, and third, or the first, second, and third steps to solve a problem. At that point, I would think that the teacher had already organized the notes, so for convenience, I would quit organizing them myself and just copy them down.
Why I don’t use it anymore: Copying word for word can take time, and copying mechanically does not deepen my understanding of the points right on the spot. Usually I need to spend more time at home to read and understand those copied notes, which further lowers my learning efficiency.
Annotating & Highlighting
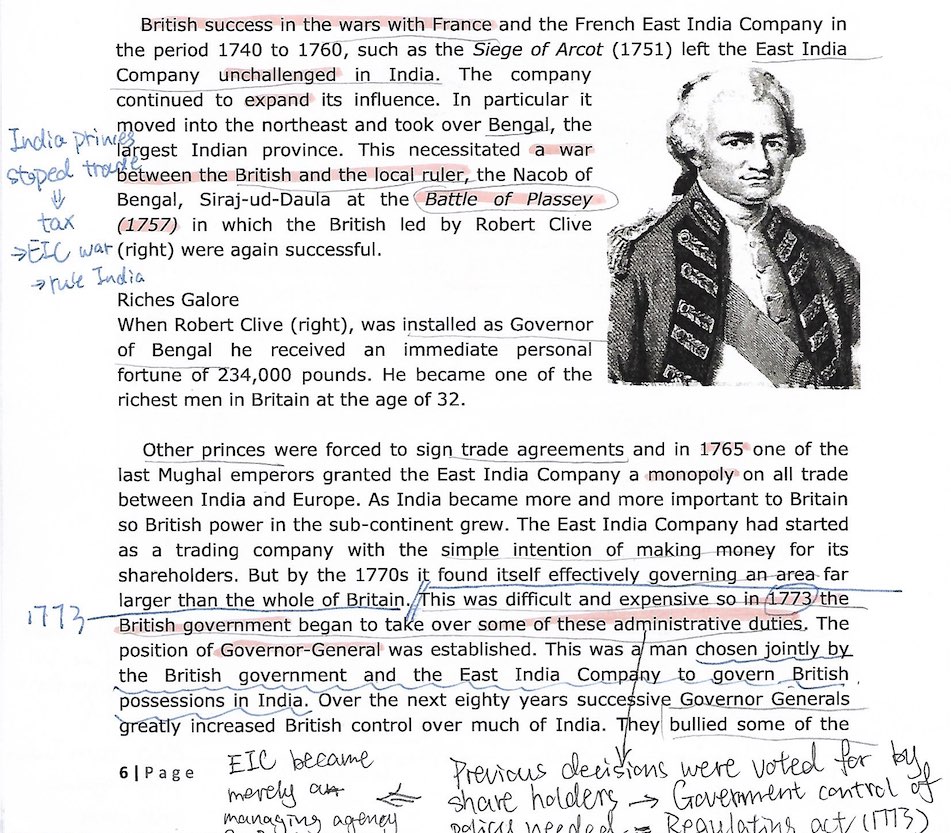
My History notes made by annotating and highlighting class materials #1
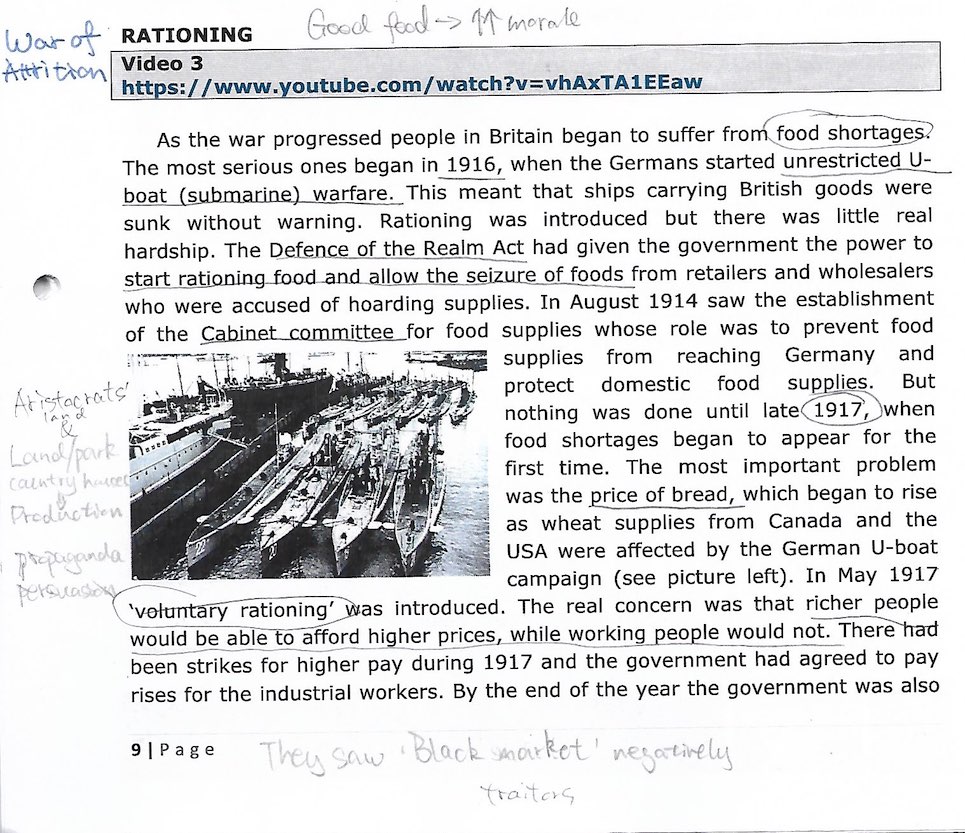
My History notes made by annotating and highlighting class materials #2
This method is to highlight directly on the material when you already have a PPT, textbook, or similar classroom material and use the margins to annotate when needed.
Why I used it before: It is simple and straightforward to annotate on already existing material. When reading the brief notes, you can immediately refer to the more detailed and longer text in the course material, saving time and effort that would be used to go through multiple documents.
Why I don’t use it anymore: Insufficient blank space that is often irregular and disjointed, which makes notes more disorganized. There is little freedom and often it is not possible to add a great deal of additional content to the notes after class. Order of the notes is limited by the order in which the information appears in the materials, and it is not possible to rearrange the points according to my own logic.
The Cornell Method
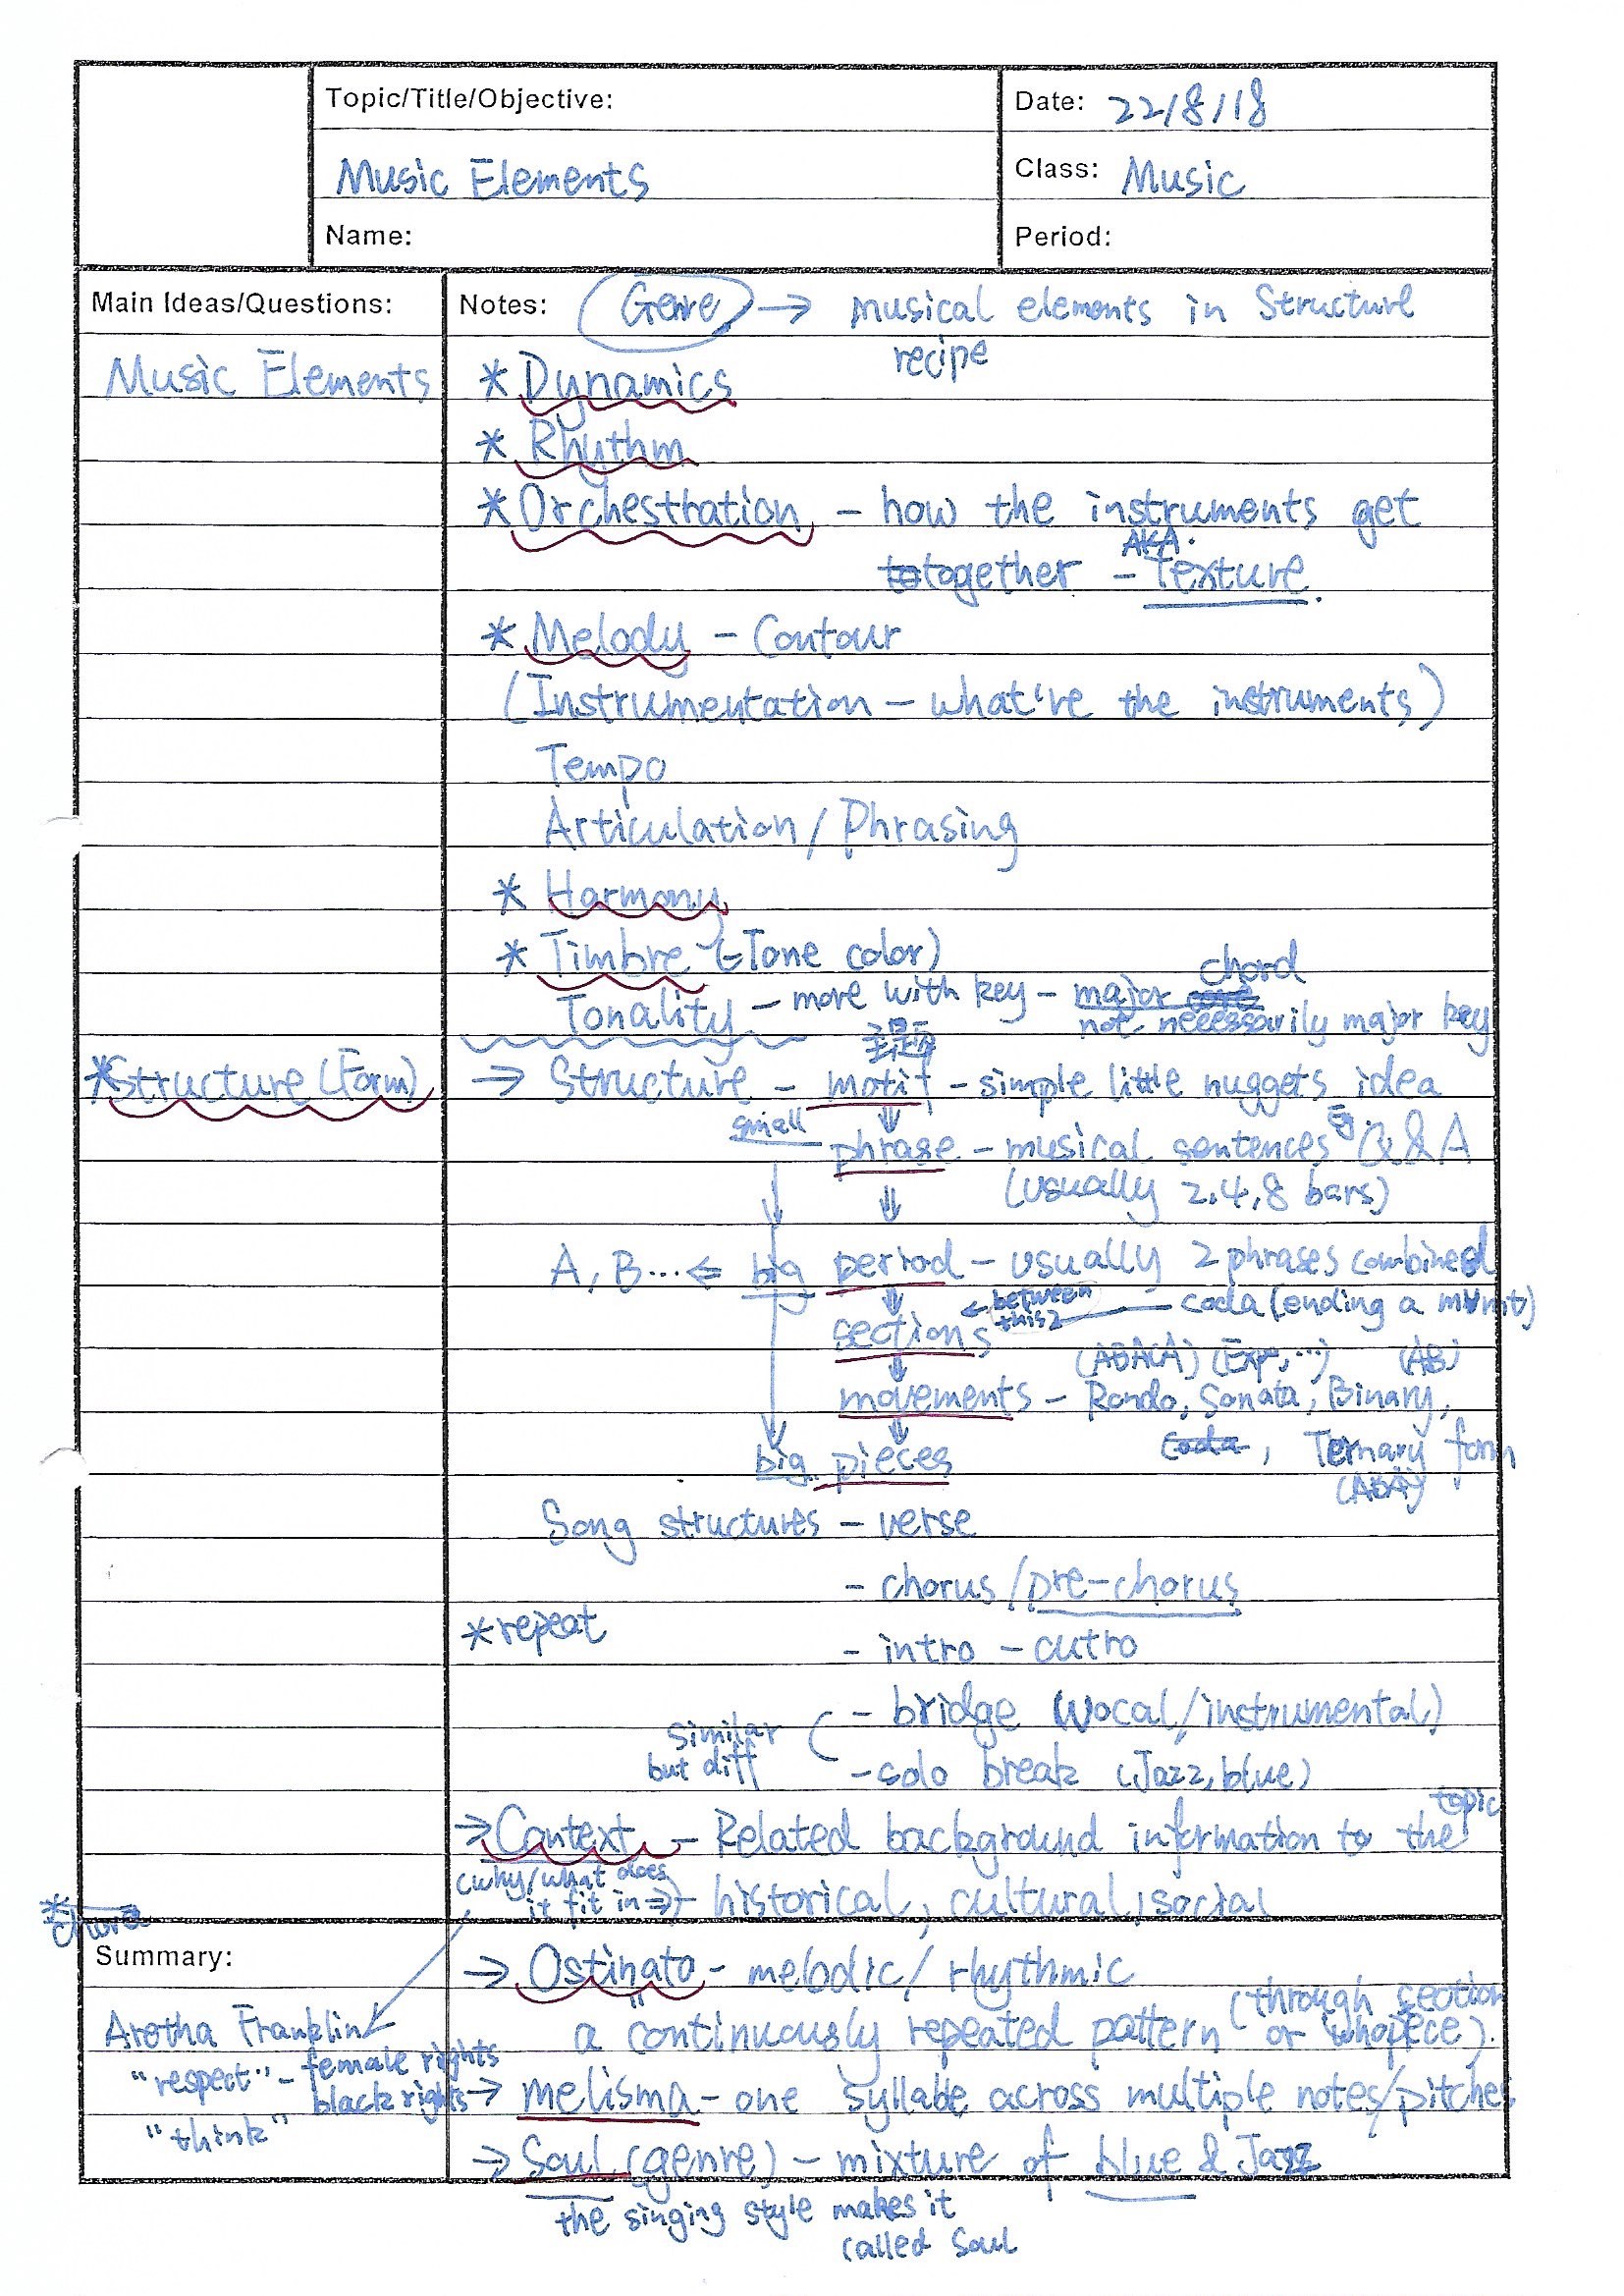
The Music notes I made with the Cornell Method
This methods divides each note page into four sections:
- Top: Title, date
- Left sidebar: Keywords, subheadings, questions, etc.
- Main column on the right: Body of the notes
- Bottom: Summary
Why I used it: It seems to have an extremely high reputation on the internet and is associated with the big-name Cornell. Partitions of notes keep the content very organized. My school provides note paper with the partitions already printed out, so I can use it directly.
Why I don’t use it anymore: the partitions are not flexible enough, and this is reflected in several ways. Since I couldn’t anticipate the content of my notes in advance, when I used the paper with the dividing lines drawn on it, I often had a lot of blank space in some sections and not enough space in others. Also, the space available for the body of the notes was too small, so that I had to turn and use many pages, which would disrupt the notes. Moreover, it’s likely that the notes on each page don’t cover exactly one subsection, so not the summary section on every page will make sense.
The Totally Free Method
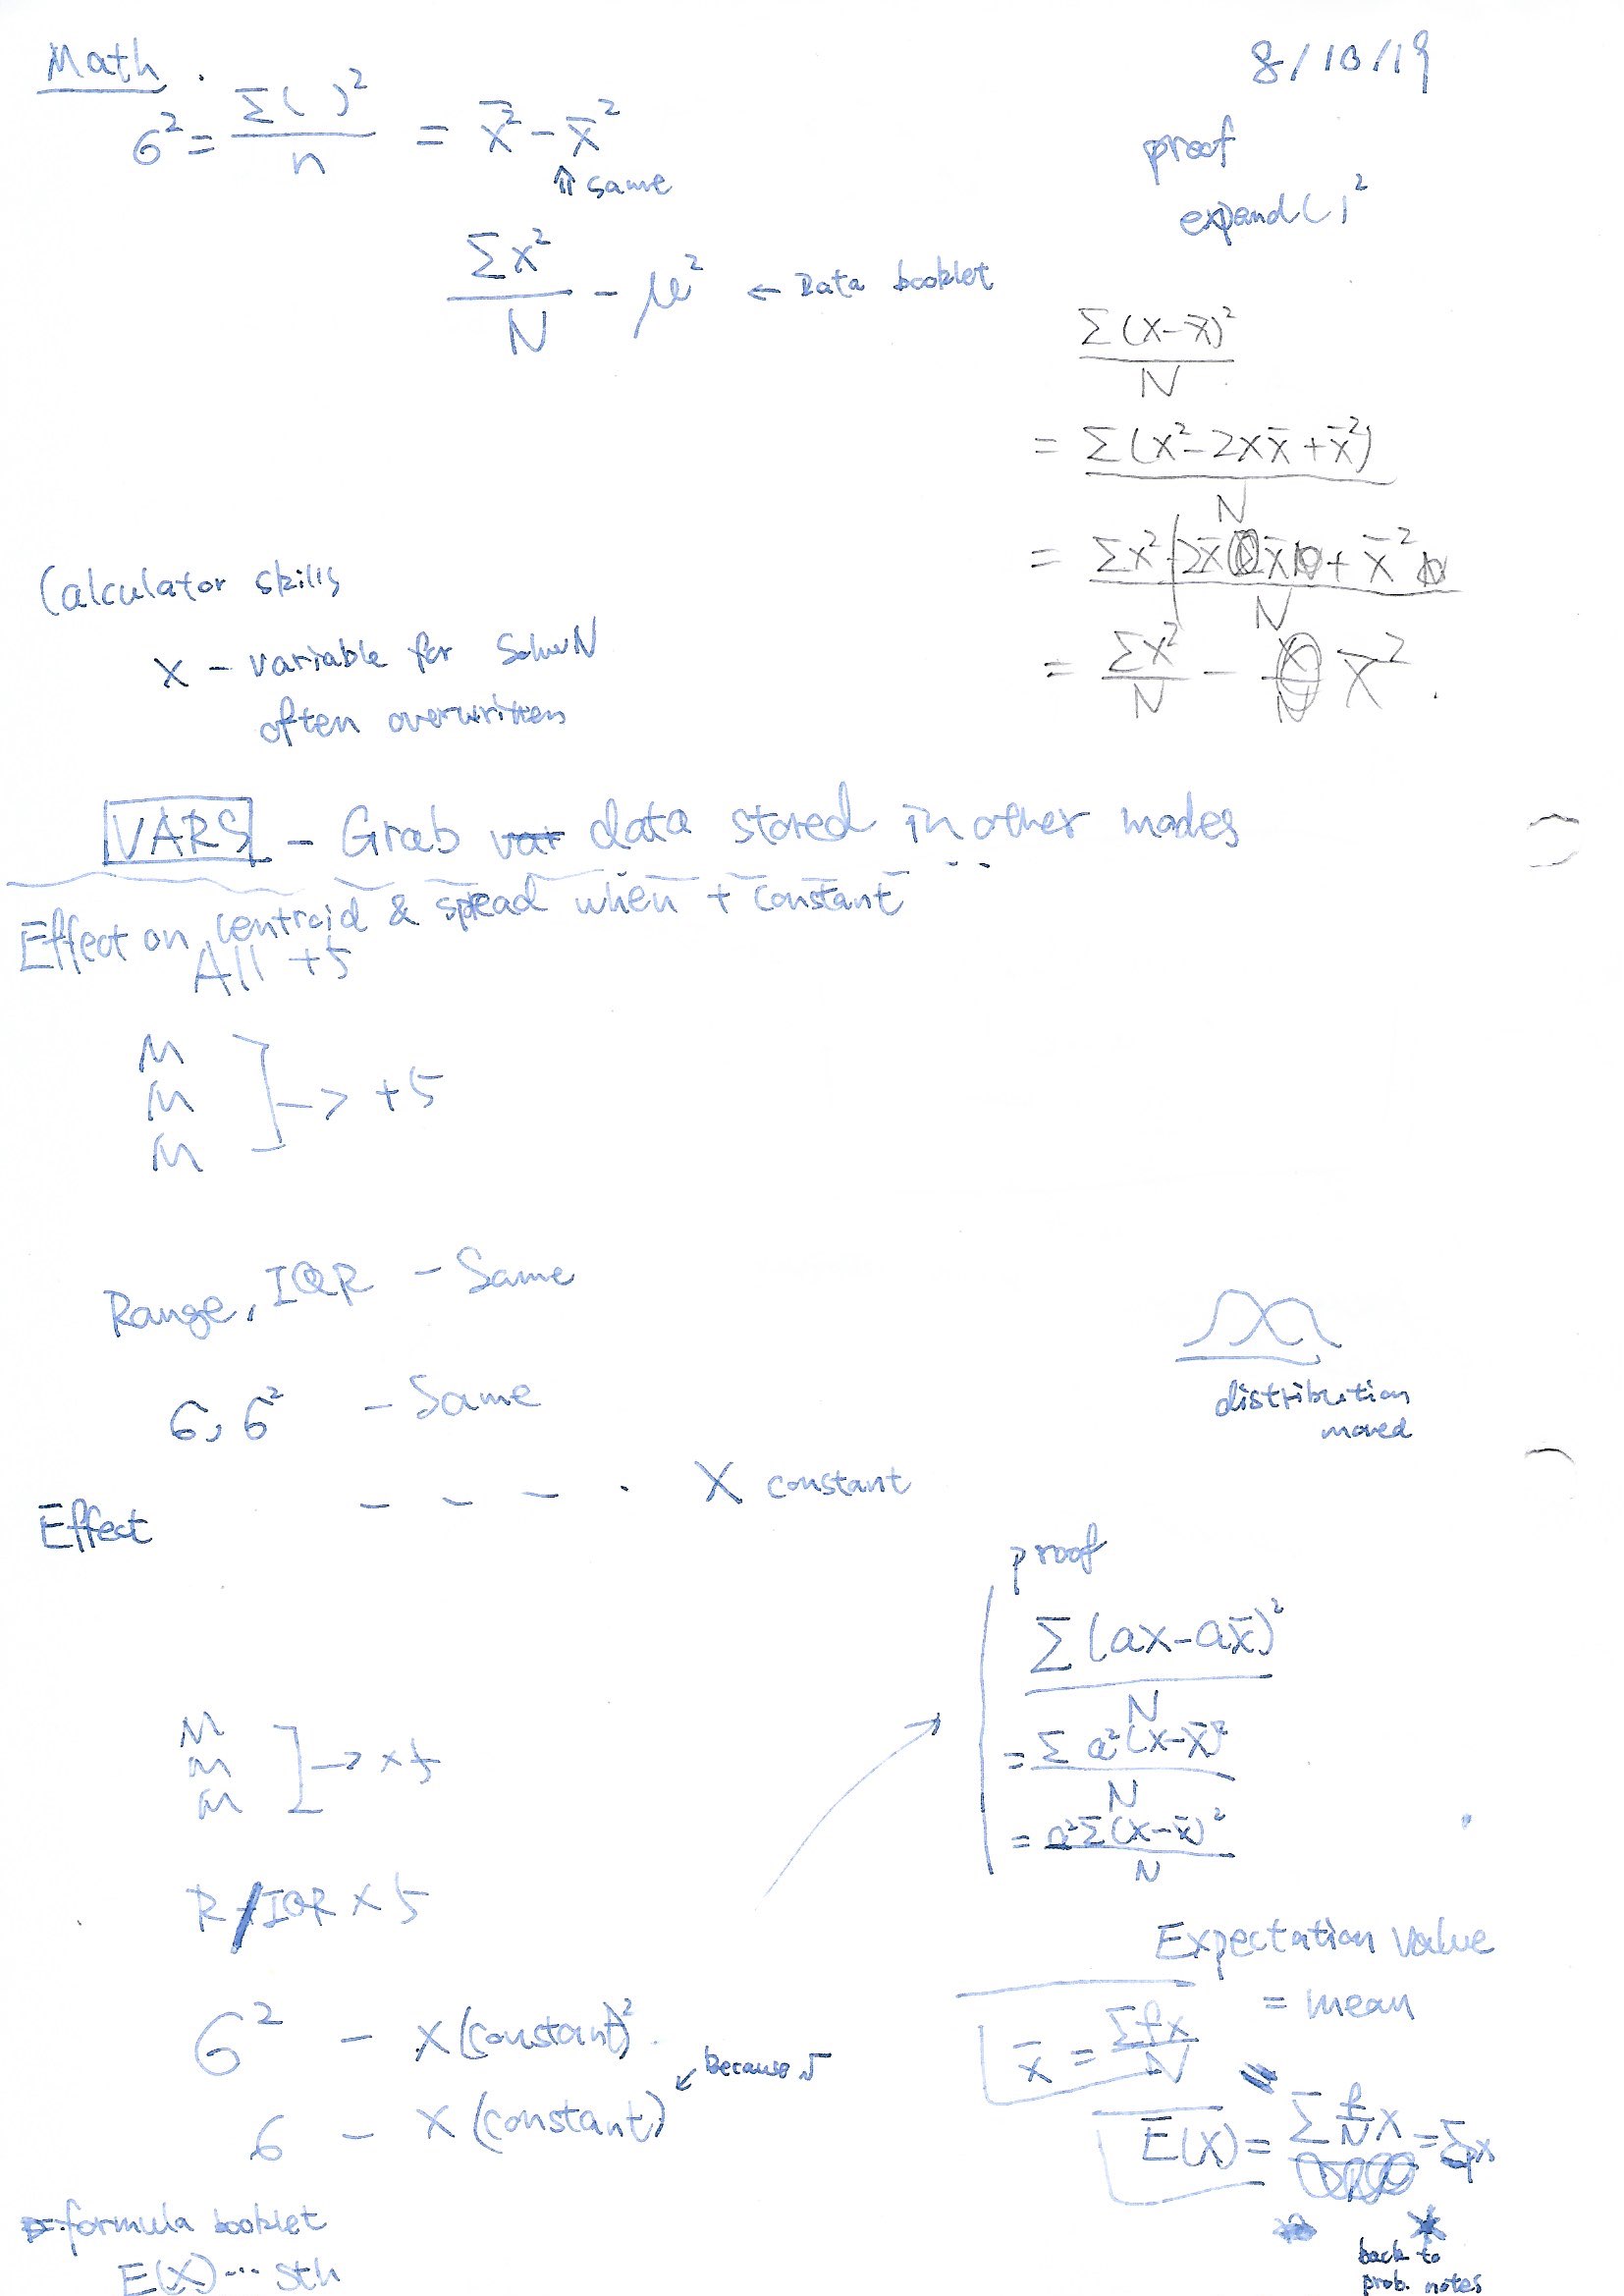
The math notes I wrote with total freedom
This is a method that I created myself and have tried to use. As the name suggests, it means that if I hear something in class that I don’t know, I write it down. By total freedom, I mean: it doesn’t matter if my handwriting is messy, it doesn’t matter if I only use abbreviations and short-hand notations, it doesn’t matter if I draw badly or only half of the diagram, and it doesn’t matter if I scribble a lot.
The main purpose of this method is: to quickly jot down key words that can help me recall the class content. As long as I don’t get distracted in class, I can definitely recall what was taught in class with a glance at my notes when I arrive home that day. With a bit of review that night, all the knowledge gets into my head. If I review the points in my notes every few days, then even if my notes look like random scribbling, in my eyes, they are already closely connected to meaningful knowledge. It no longer matters what is on the paper.
Why I used it: It’s free, so I don’t have to spend time thinking about formatting and sentence structure when I take notes. After all, I can just scratch a few strokes and jot things down. This allows me to devote more energy into listening to the lecture, understanding it on the spot, and asking questions there, which can improve my efficiency of listening in class.
Why I don’t use it anymore: When the amount of notes increases, it’s not possible to review all my notes “every few days”. After a few weeks, when I look at my previous notes, even if I remember most of the key points, if I see a chaotic mess filled with abbreviations, it’ll take a lot of effort to understand them, which is not helpful for filling in the gaps in my knowledge.
My Principles
My notes should be easy to record in class and easy to use after class. Both are essential.
More specifically, my notes need to be free and “inclusive”—they need to accommodate all forms of content: words, font sizes, diagrams, formulas; they need to accommodate not only the content in class, but also any additional content that may be added after class. The format needs to look comfortable, and the structure needs to be effective in organizing the content so that it is clear and easy to access. It is important to reduce unnecessary information in the notes to avoid distractions and disruptions, but also important to have enough information that will quickly help me understand more deeply or jog my memory.
My Method
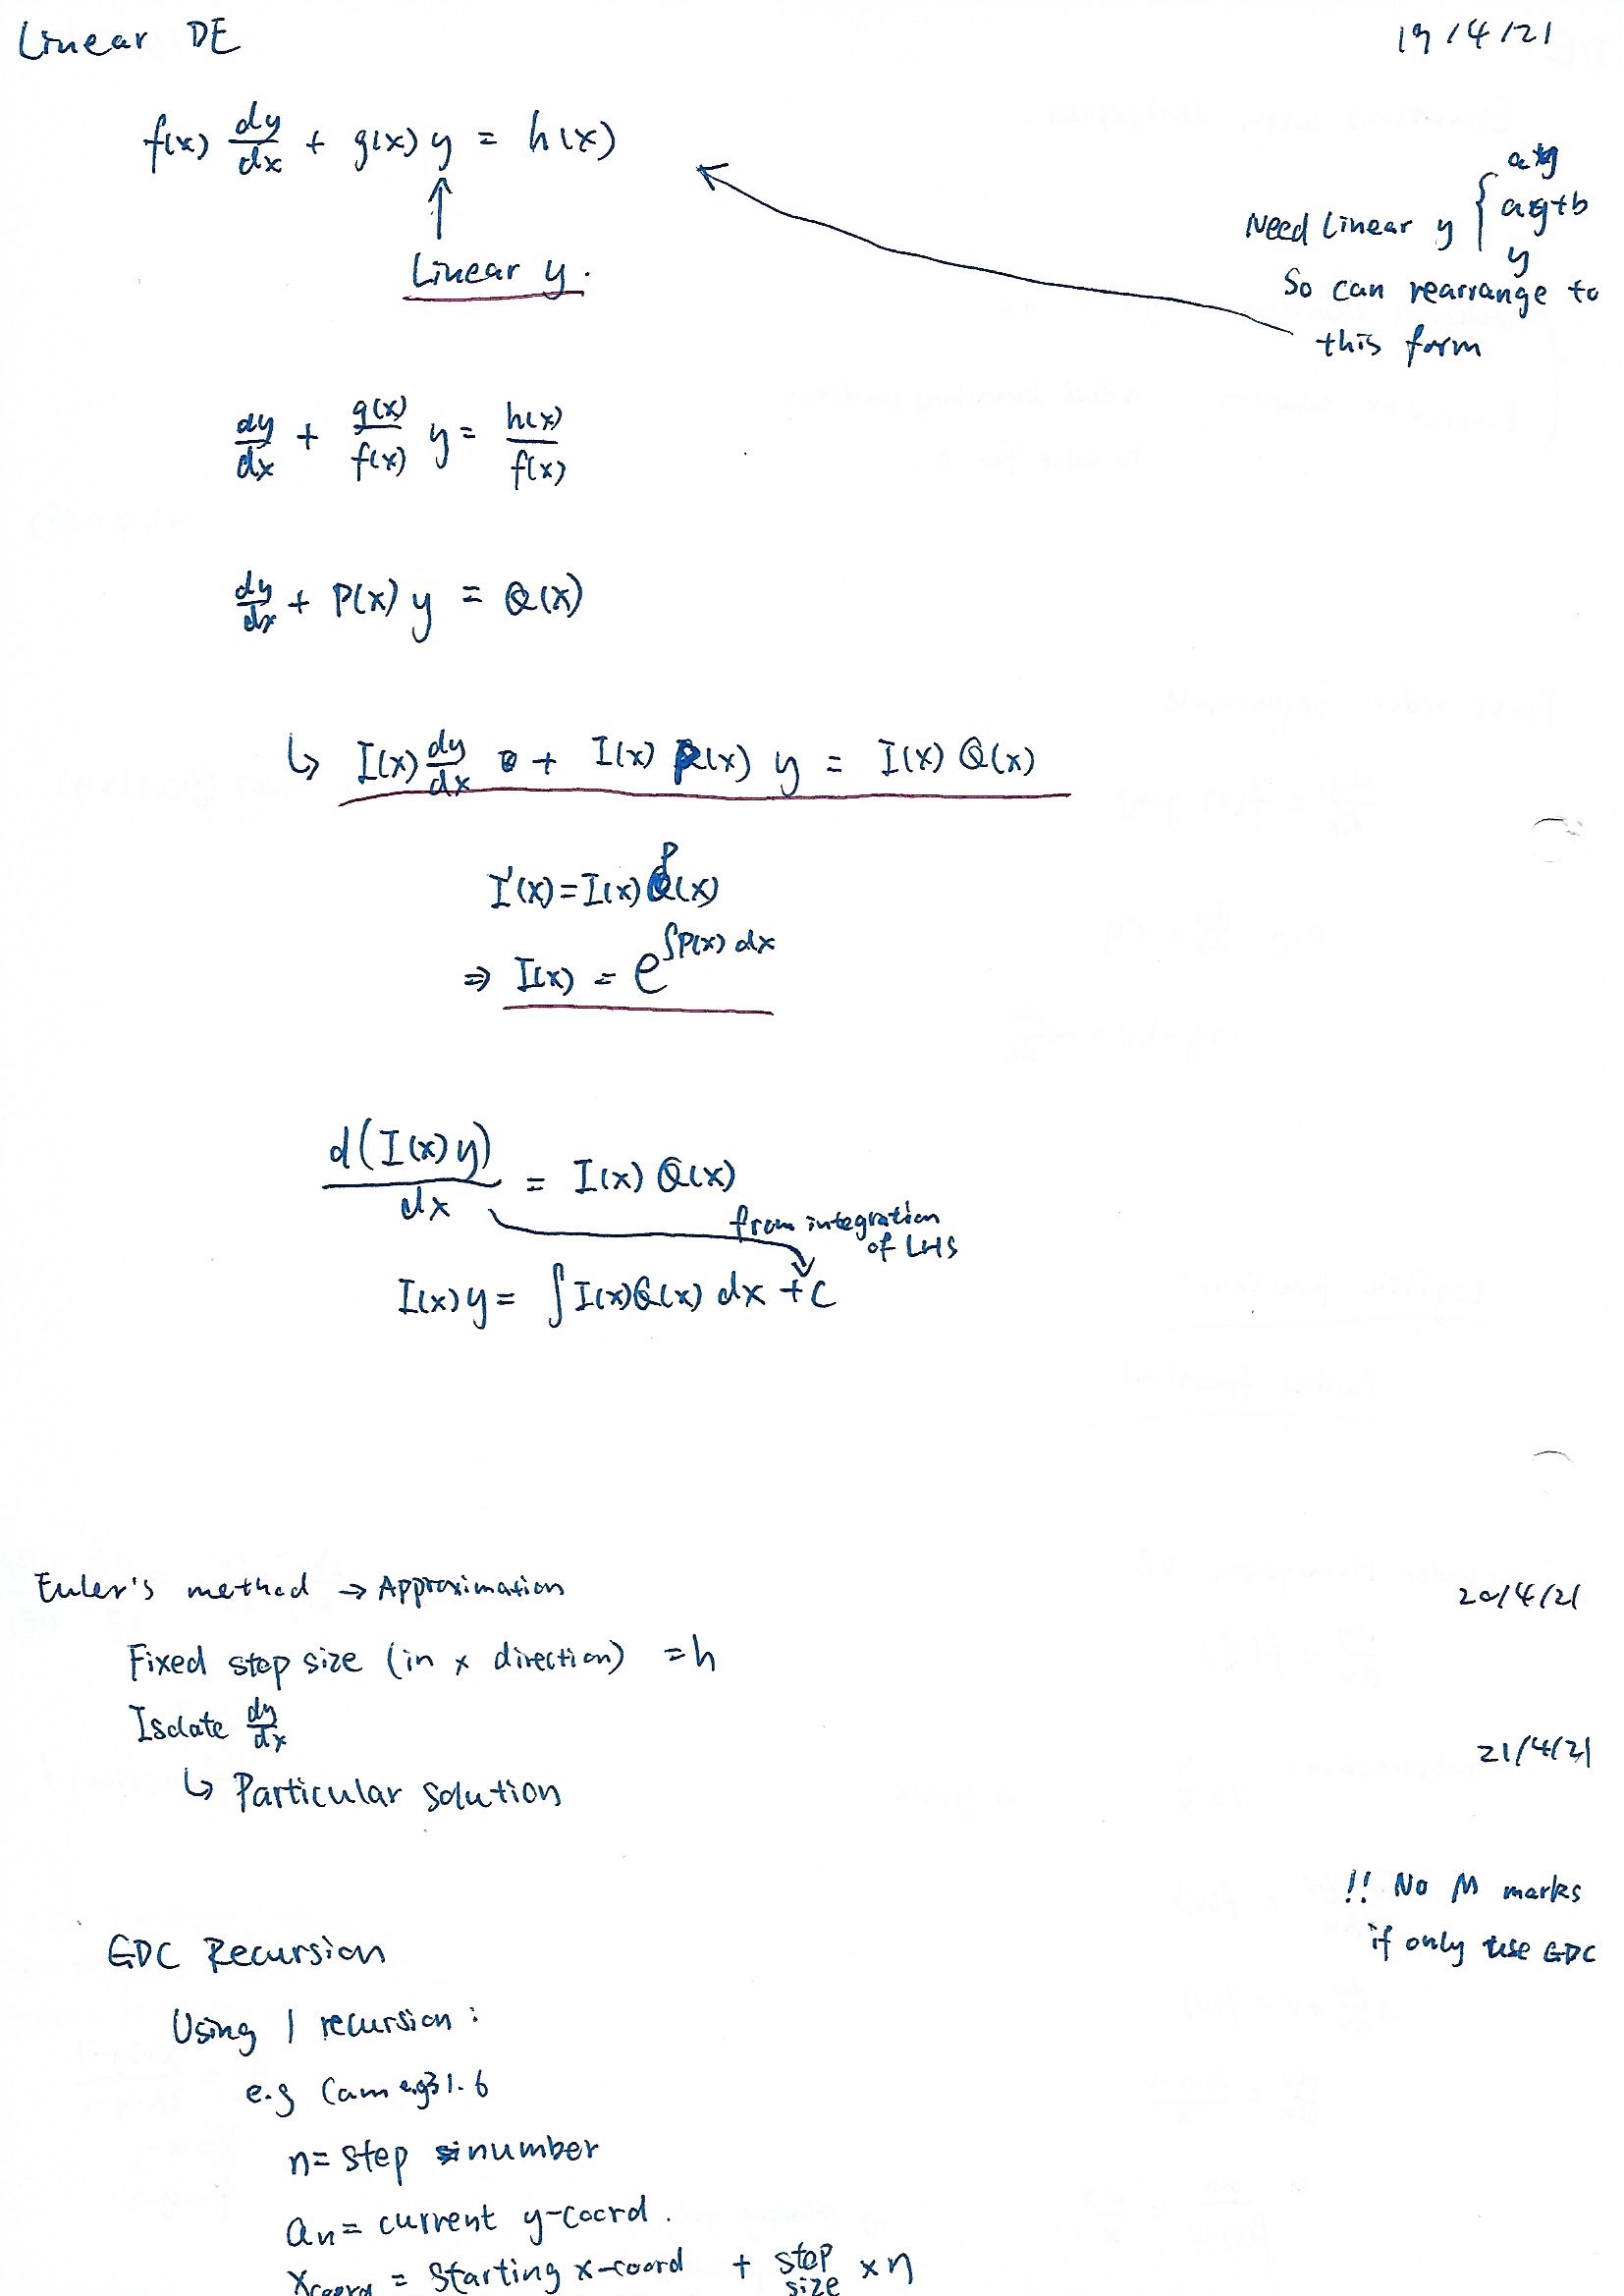
My Math notes made with my current method
Paper & Notebook
Loose A4 blank paper
Plastic loose leaf folder (2 holes, flipping pages from left to right)
Sections
Start of each note entry: chapter or section number (if applicable), title (if applicable), date
Left-side main column on each page: main content, including various subheadings, body of notes, important diagrams, important formulas, etc.
Right-side sidebar on each page: minor points or supplementary content corresponding to the left-side content, including connections between knowledge in the main text (on the left-side) and other topics, alternative forms of formulas, less important diagrams, extensions or interesting facts, etc.
New chapters start on a separate page, otherwise I continue from where I left off with my notes.
Instead of having a clear dividing line on the paper, I keep a rough “fuzzy division line” in my mind, with the left and right sides allowed to be interspersed. You can think of this as a modified version of the Cornell Method’s note partitioning.
Content
I only take detailed notes on what I don’t know at the moment, refusing any urge to write down what I already know again, in the name of “consolidating knowledge “. If I really want to write down what I have already learned, I will only write out subheadings and leave a small space for additional notes later, or for adding a few important details that might be mentioned in class.
Use more key words and fewer complete sentences. Use symbols, abbreviations, and formatting (white space, indentation, slanted lines of text) to replace textual explanations and classify content.
Format
Color: Mainly use blue and red only. Blue to take notes, red to underline key points.
Marking key points: Use only red straight lines as underlines for key points. No markers, curved underlines, dots, boxes, circles, bubbles, etc.
Correction: Use correction tape and correction fluid less often. For a small number of corrections, just cross out the wrong things and write the correct things next to them. For a large number of corrections, draw a box directly around the area to be corrected, cross out the entire area with a diagonal line, or simply get a new sheet of paper. To reduce corrections, I can write in pencil first for areas that I am unsure about and cover them directly with a pen when I organize the notes after class; or I can just write down the subheadings and add the content after class.
Annotations & connections: green is used in a few places to indicate other materials related to the note content, such as textbook chapters, hand-outs, etc. Sometimes it is necessary to expand on a key point in the notes, so I mark it in the body of the notes with a blue curved underline and use the same type of underline when elaborating the note on the right—the equivalent of a superscript and a footnote 1.
Blank space: Between paragraphs, there is usually enough blank space. This makes the layout looser and more comfortable for me to look at. It also makes the structure of my notes clearer and improves my efficiency in using them. The closely linked content has little space between them and I try to make it possible to see a whole part of notes at once.
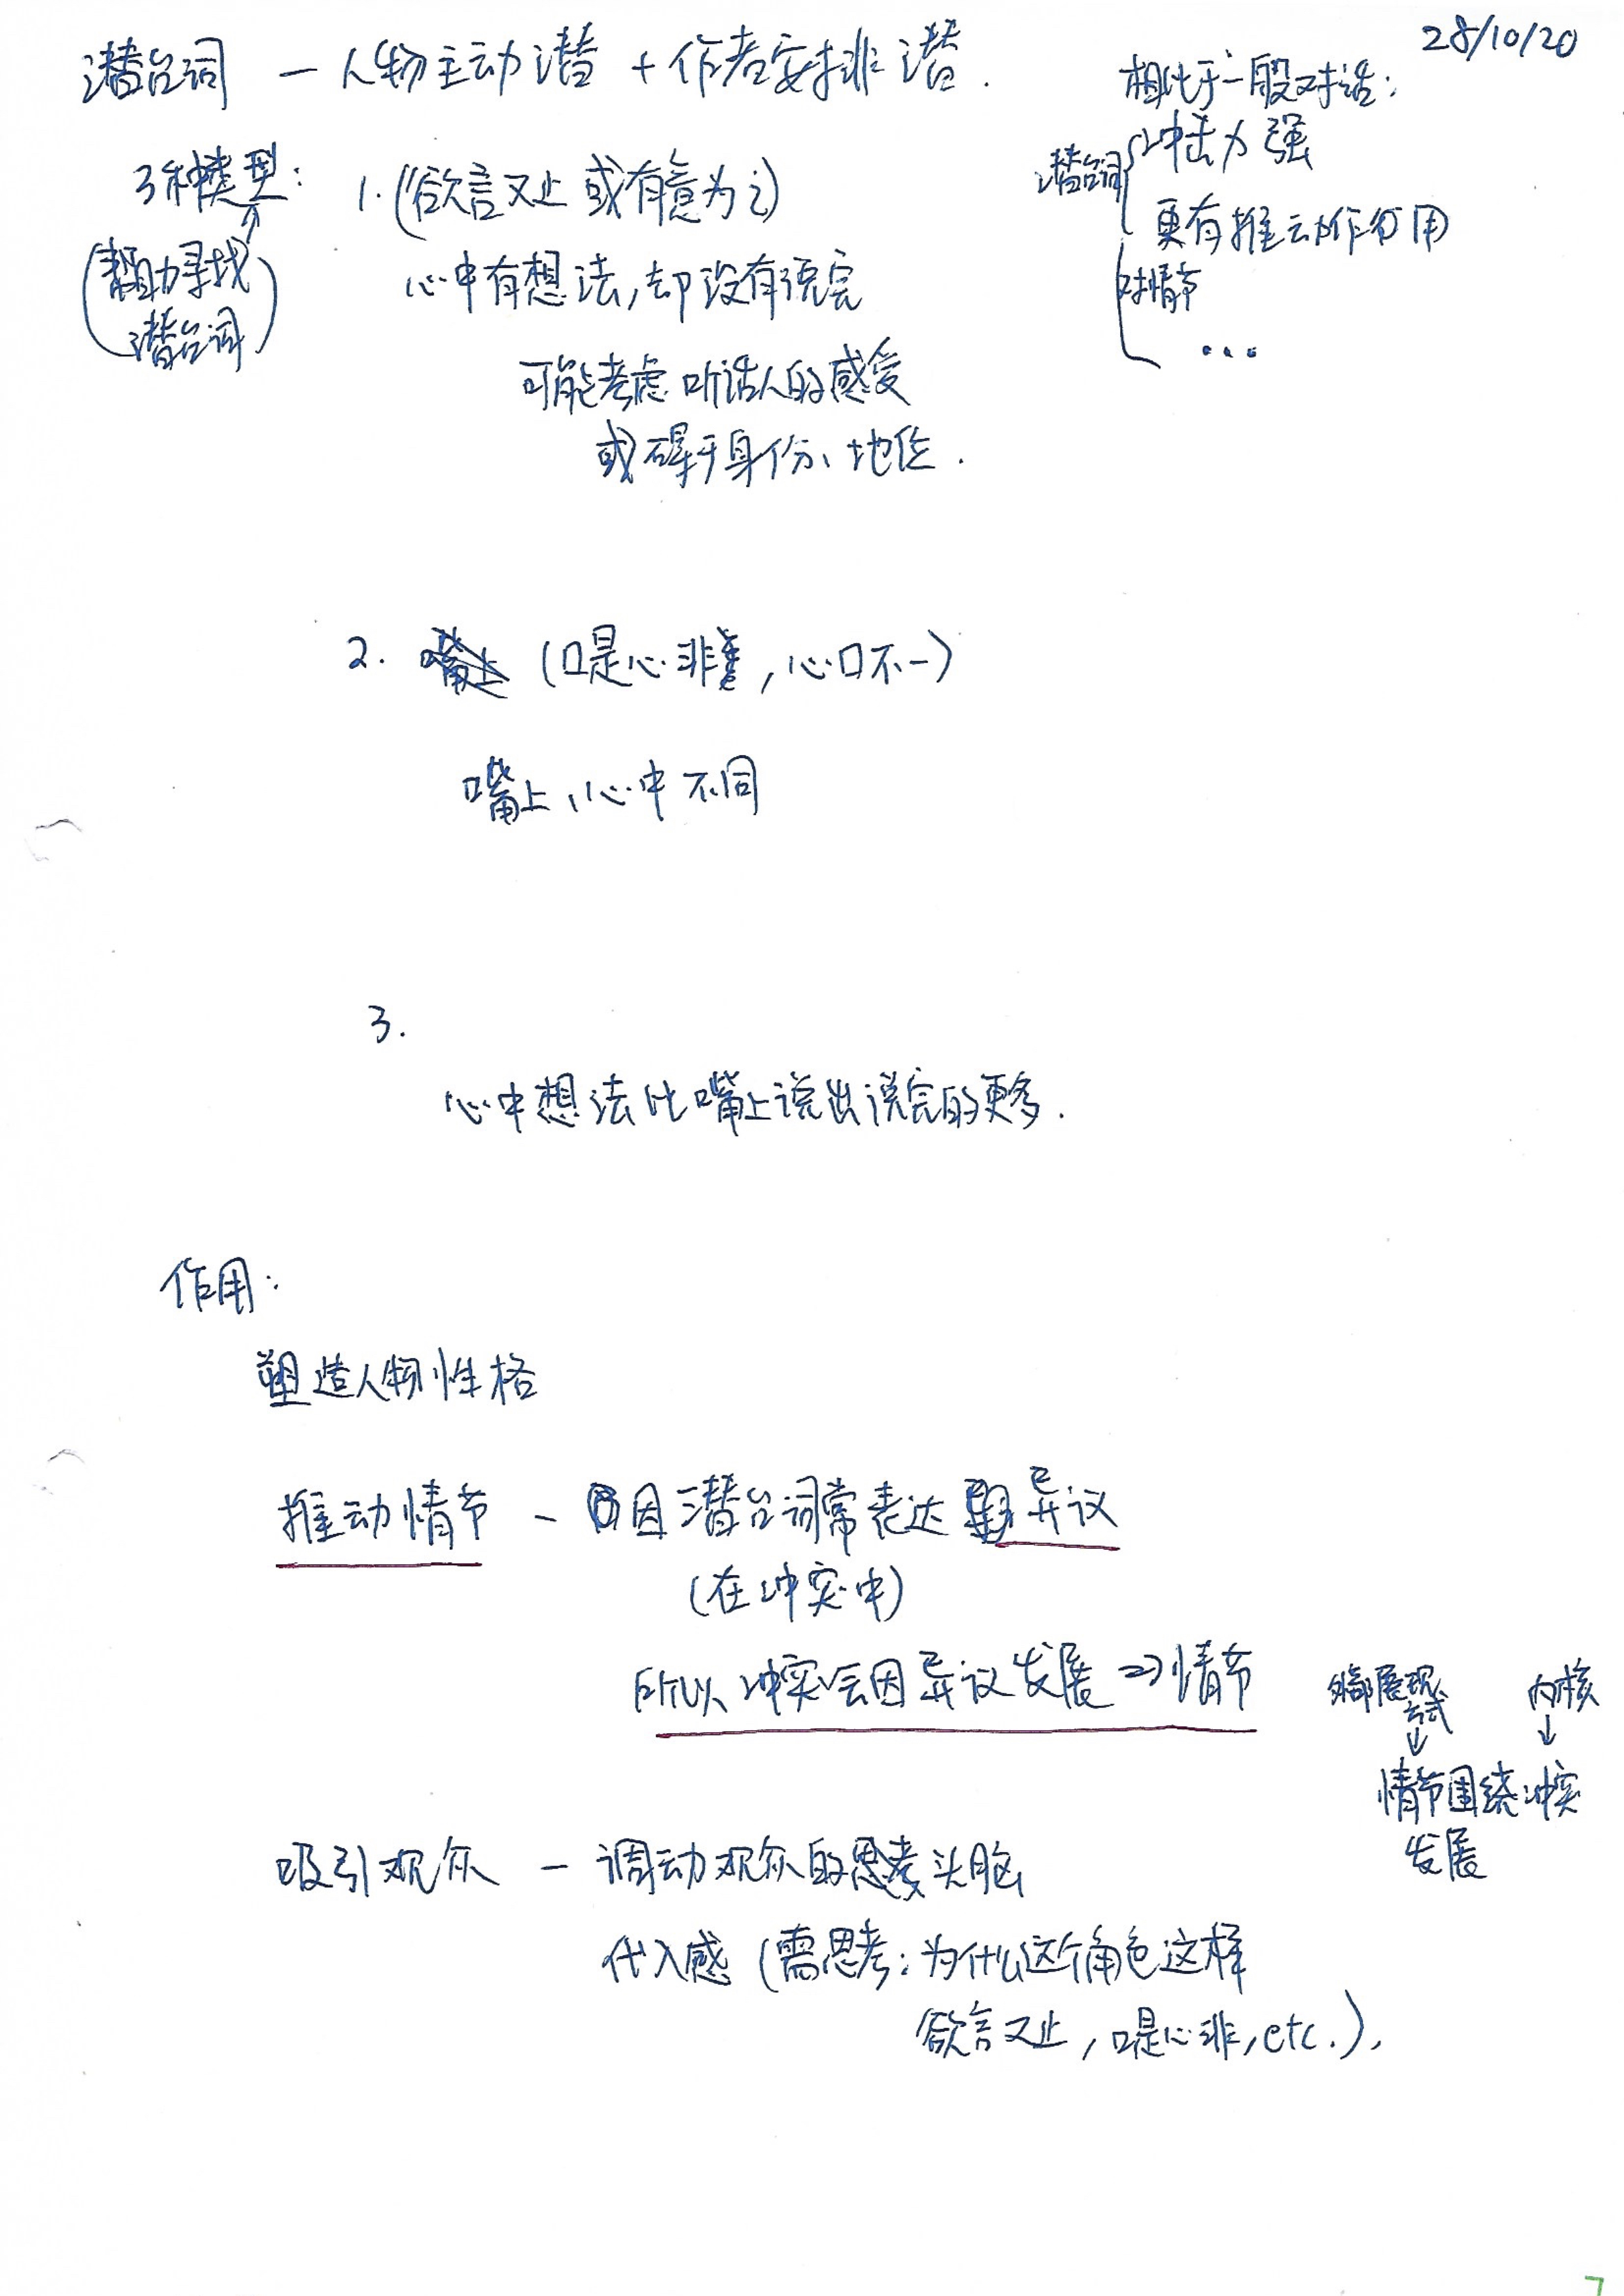
Another recent example: My Chinese A Literature notes made with my current method
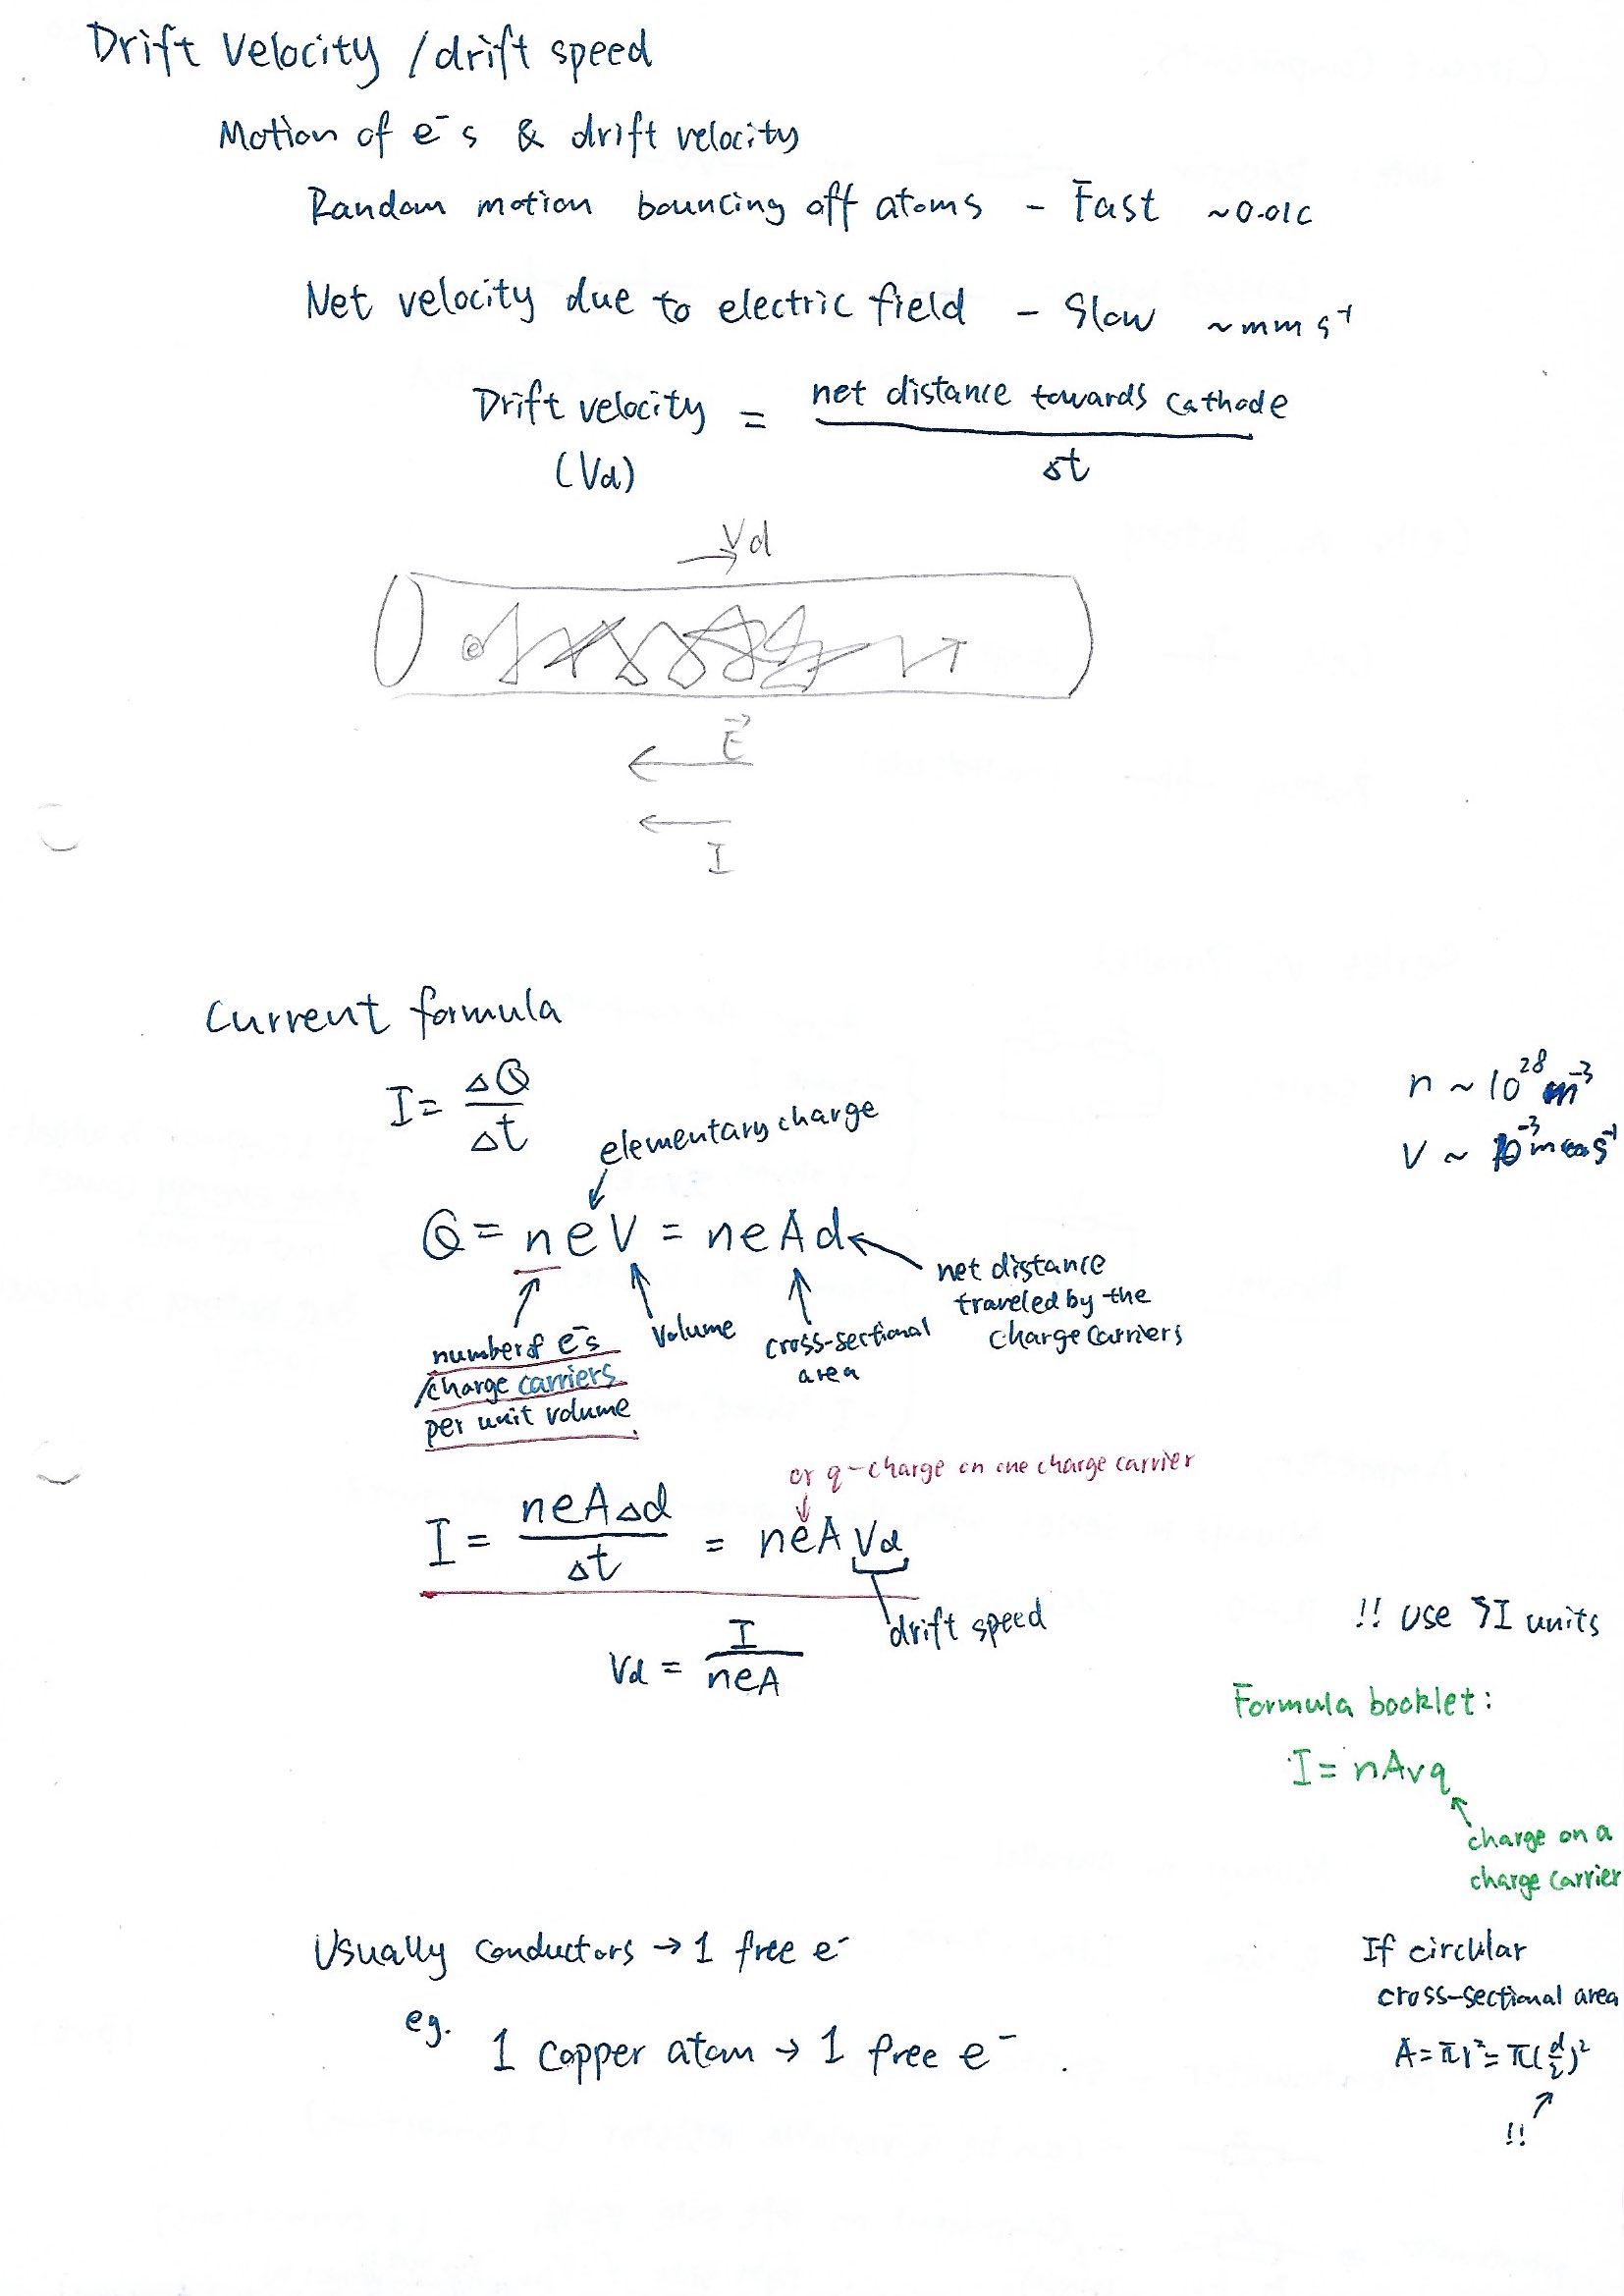
One more recent example: My Physics notes made with my current method
Pros & Cons of My Current Method
Pros:
Loose-leaf notebook, free to take out the content, change pages and add pages. Blank paper, so the format and content of notes are not restricted. Simple format, so note-taking is faster and easier, and the content is clearer, thereby improving the efficiency of getting information when using notes.
Cons:
The page edge is not aligned on the right and the pages do not turn smoothly. Pages may fall out. The iron ring in the middle of the loose-leaf binder affects the hand feeling, and when taking notes against the middle iron ring, you may poke the paper or leave fold marks, because the rings and binding device in the middle have a certain height, which makes the paper uneven under pressure.
This note-taking method is useful for all the sciences I studied, but in the arts, it is only useful for Chinese literature—English B does not require me to take systematic notes at all, so my experience is limited; for history, I never really found any particularly systematic and effective study or note-taking method, and I usually just crammed before unit tests, midterms and finals. Only when I was preparing for the final exam ($\approx$ re-learning IB History on my own) did I feel a little more comfortable learning history 😂
To deal with the drawback that the right-hand edge is not clear-cut and the pages don’t turn smoothly, I tried using a stapled notebook. This did make it easier for me to turn the pages, but I felt not only comfortable, but also constrained—I was afraid to write because I couldn’t stop worrying about whether I would write things wrong on a page and not be able to change for a new sheet of paper, or whether I would write things wrong on many pages at once and interrupt my notes. So far, I still prefer to use a loose-leaf notebook to take notes. For practicing problems, I think I can use a bound notebook.
Conclusion
In this post I introduced some of the note-taking methods I’ve tried. Then, I also summarized and shared my current note-taking method, with a few pages of notes taken with this method as examples. Finally, I analyzed the advantages and disadvantages of my current method. Everyone learns differently. My method works for me, but it may not work for everyone, but I hope this post has given you some inspiration for note-taking!
The methods I’ve abandoned are not useless. They just didn’t fit my scenario of note-taking. When I was revising for the IB DP May Exams, I printed out some Chinese A literature materials and took notes on them directly by making annotations, for example, writing answer outlines and underlining key words and phrases, which was very convenient.
This article does not cover the methods of organizing study materials or methods of note-taking which apply to homework, problem packets and workbooks. I will be sharing these in future articles.
Thank you for reading! I’m not a teacher but just an IB student who has bits of thoughts. Although this post is mainly meant to summarize my experience for my own future reference, if you feel that my note-taking methods are not good enough, you are very welcomed to leave a comment below to share your thoughts or email communication! (Also look for contact information at the end of the “About” section of this blog.) I’d really like to learn more note-taking methods!
TL;DR
My note-taking method:
- Punched blank paper, loose-leaf notebook.
- Left-side main column for body of notes, right-side sidebar is for additional content.
- Less, less, less! Use fewer colors, fewer bubbles, boxes, stars, and use less of a variety of underlines, and so on, to mark up key points. All forms and formatting should only serve to enhance the content.
- Concise, concise, concise! Remove unnecessary information, keeping new knowledge and keywords. But still with the right amount of detail to ensure that I can understand the notes.
Example notes: See the images in the section “My Method” in this article.
-
Just like this. This allows me to explain things in depth where there’s more space, without interrupting the flow of my notes. ↩︎
